Download
the Toolbar icons needed for this tutorial
The toolbar is a very popular and much-used addition to a programme. It’s difficult
to think of a piece of software that doesn’t make use of them. VB.NET lets you
add toolbars to your forms, and the process is quite straightforward. Let’s
see how it’s done:
Either start a new Windows project, or keep the one you currently have. To
add a toolbar to the top of your form, expand the Toolbox and locate the ToolStrip
control:
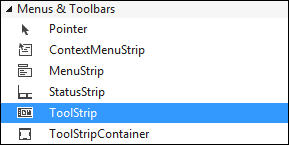
Double click the ToolStrip control, and it will be added to the top of your
form:

You should also notice the ToolStrip object that appears at the bottom of the
window:

ToolStrips work by adding buttons and images to them. The button is then clicked,
and an action performed.
Click on your ToolStrip to select it. In the property box for the ToolStrip,
you’ll notice that it has the default Name of ToolStrip1. We’ll keep
this Name. But locate the Items (Collection) property:
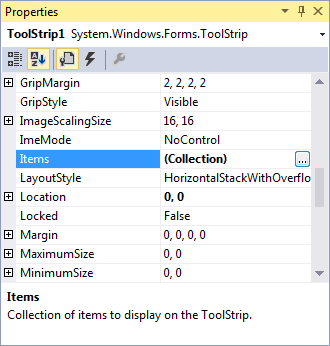
Click the button with the three dots in it. This brings up the Items Collection
Editor:
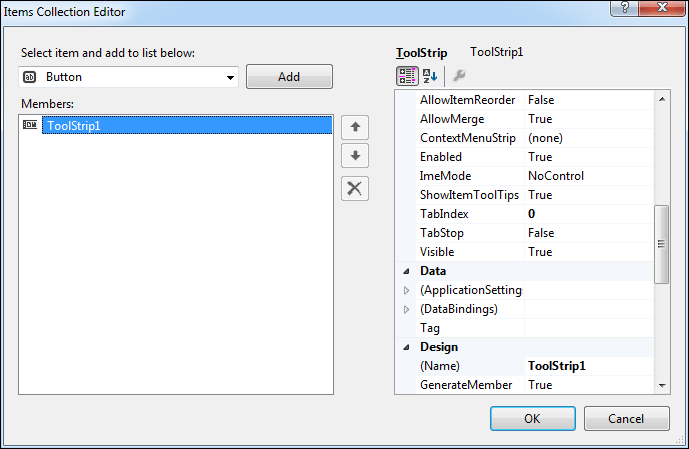
To add a new button to your ToolStrip, click the Add button at the top.
The button appears in the Members box (ToolStripButton1):
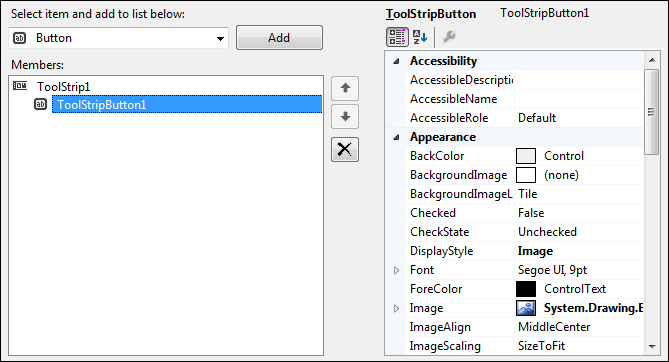
Notice that the new button has its own list of properties, just to the right.
To add an image to this new button, locate the Image property:
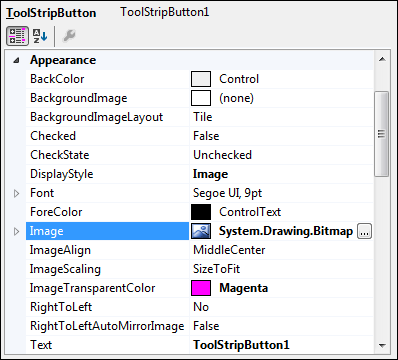
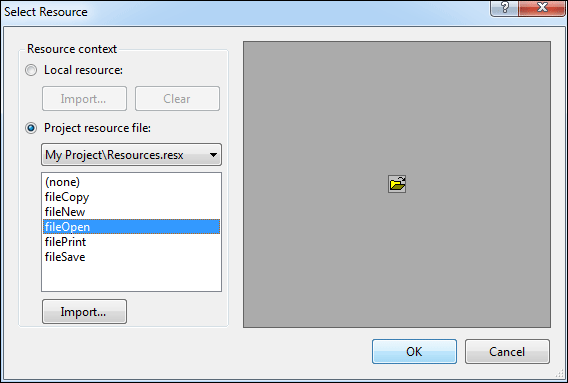
Click the small button with the 3 dots in it to bring up the Select Resource
box:
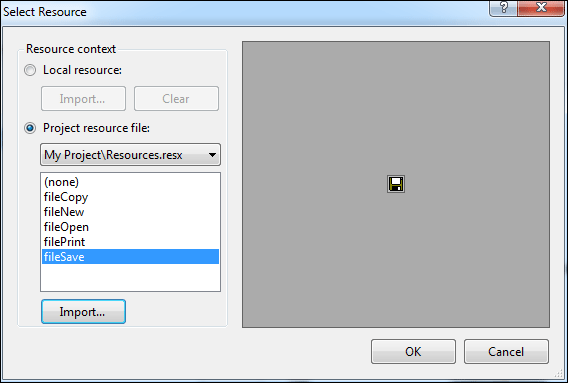
In the image above, we’ve selected “Project resource file”, and then
clicked the Import button. We then navigated to some Bitmap images and imported
the five that you can see in the screenshot above (these are in the BITMAP folder
that you download at the top of this tutorial). Click OK when you have imported
some images. You will be returned to the Item Collection Editor. Click OK on
this, as well. The ToolStrip on your form will then look like this:

The second of those images is a dropdown list of available ToolStrip options:
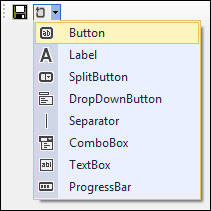
To add a new button to the toolstrip, click on Button from the drop down menu
in the image above. A default button is added called ToolStripButton2. (The
first button is called ToolStripButton1.)

To change the picture of the new button, locate the Image property in the properties
area bottom right:
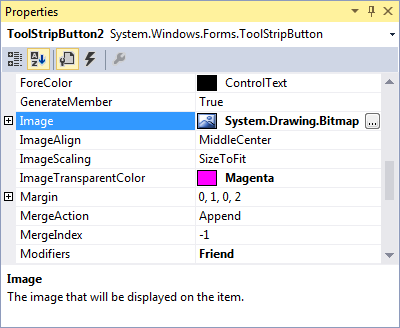
Click the button with the three dots in it to bring up the Select Resource
dialogue box again. Select Project resource file from the list, and choose a
new icon:
The default button image will then change to the one you selected:

(If you wanted to, you could change the name of the button. Just delete ToolStripButton2
from the Name property and type a new one.).
Repeat the steps above to add more buttons to the toolstrip. It should then
look something like ours:

There is, however, a problem with our toolstrip images: they all have an awful
grey background. You can get rid of background colours on toolstrip images by
changing the ImageTransparentColor property.
Make sure one of your buttons is selected. In the properties area in the bottom
right, locate ImageTransparentColor. The default is Magenta. You can
change this. Click inside the Magenta text box and press the delete key on your
keyboard. Change Magenta to the numbers 192, 192, 192. (This is the RGB colour
of our grey background. We got these numbers from image editing software.) Press
the Enter key on your keyboard and these numbers will change to the named colour
Silver:
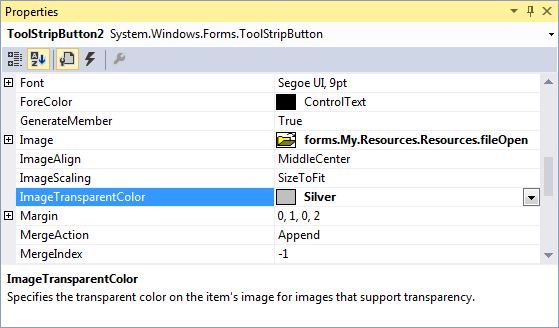
Change all the other colours on your toolstrip from Magenta to Silver. When
you run your form again, it should look like this:

Of course, if you click on the buttons nothing will happen. We need
to write the code that gets them to work. We’ll do that now.
Coding For your Toolbar buttons
Double click your first ToolStripbutton to bring up the coding window. It
should look like this:

You can place any code you like, here. Try a message box, as in the image below:

Run your programme and click your ToolStrip button. You should see the message
box display. In a real programme, however, the code would be the same code for
a menu item – it’s just shortcut, after all!
In the next part, you’ll learn how to create multiple forms in a VB NET project.
Create Multiple Forms –>
Back to the VB NET Contents Page
