In the previous lesson, you saw how to add code for items selected from a Toolbar.
In this lesson, you’ll learn how to start a new Activity for Toolbar menu items.
Instead of just displaying some text when a menu item is selected, you’ll want
to do something useful. Typically, you’ll want to start a new activity. For
example, we have a favourites menu item. When this item is selected, we might
want to display images of our favourite people, or favourite cats, or favourite
anything. All you do here is to create a new intent, just like you did in previous
sections. Let’s see an example.
Add a new Activity to your project by right-clicking on your app folder
in the explorer on the left of Android Studio. From the menu that appears, select
New > Android Empty Activity. Give it the name DisplayFavs:
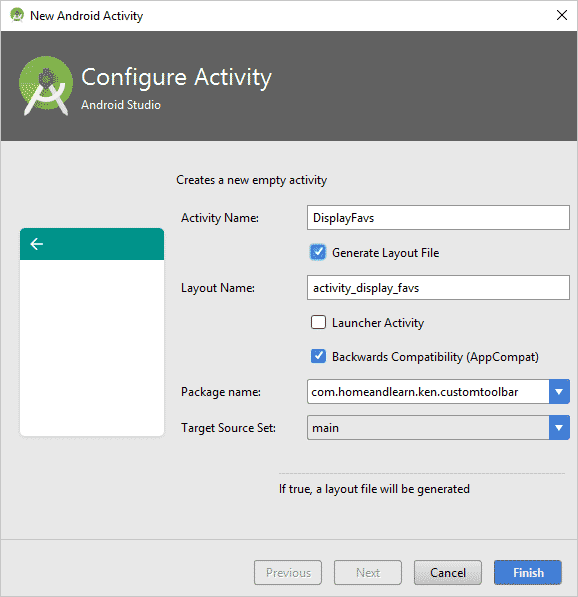
Make sure Backwards Compatibility is checked, if you’re using
an older version of Android Studio, and click Finish to create
your new Activity.
You can create a toolbar for your new Activity quit easily by copying the XML
for the one you already have.
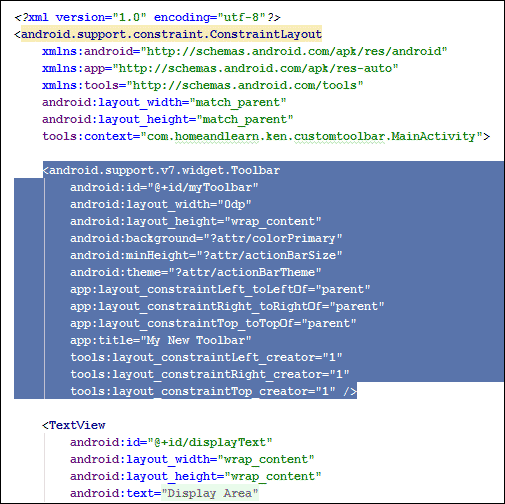
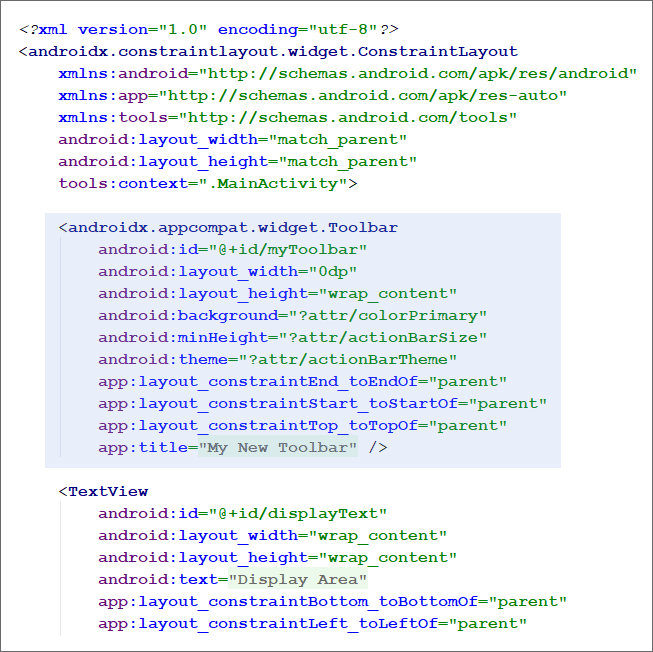
Click back on your activity_main.xml file. Make sure you are
in Text view rather than Design view. Now highlight all the XML for
the toolbar. Here it is for older versions of Android Studio:
And here it is for newer versions:
Copy this text and go to your new XML file, which should be called
activity_display_favs.xml. Again on the Text tab, paste your
toolbar XML. Here your code in earlier Android Studio versions:
![]()
In here’s the code in later versions:
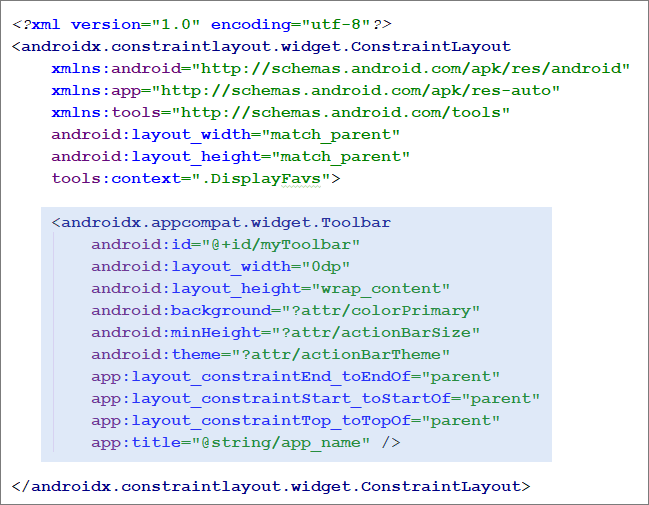
Notice the android:id at the top. You need to change this from
my_toolbar to something else. Give it the ID favs_toolbar:
![]()
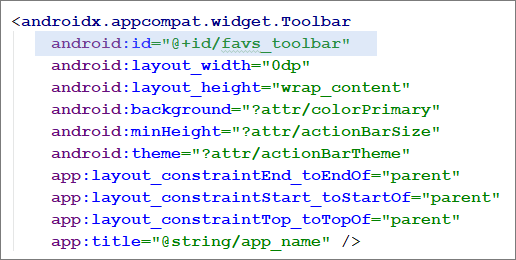
Now click back to the Design tab to see your layout. It should look
like this: (You may see the same title again at the top of the Toolbar.
We’ll change this soon.)
![]()
Have a look at the Component Tree on the left and your new toolbar should be
on the list:
![]()
(If it’s not, close down your project and open it back up again.)
You can set the title property for toolbar, just like you did before.
We’ve added a new string to our strings.xml file, in the image below,
and set the text of the string to Fav Activity. The name of the string
was second_activity.
![]()
You can attach the toolbar and menu to the second Activity in the same you
did for the Main Activity. Add this code to the onCreate method of your DisplayFavs.java
file (add it just after setContentView):
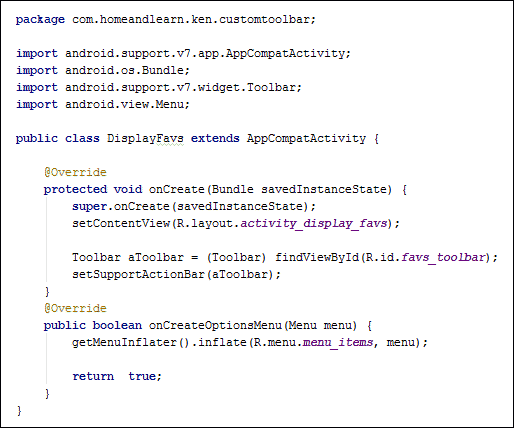
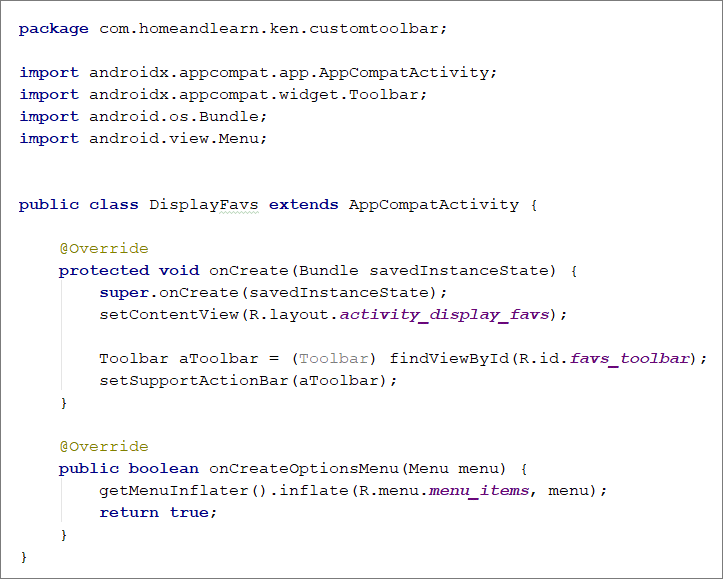
Toolbar aToolbar = (Toolbar) findViewById(R.id.favs_toolbar);
setSupportActionBar(aToolbar);
This time, we’re using favs_toolbar after R.id. If you
get any red text, press ALT + ENTER to add the correct library. Or add
import android.support.v7.widget.Toolbar; if you’re using an
earlier version of Android Studio. For later versions, add this import:
import androidx.appcompat.widget.Toolbar;.
Next, add your menu items by overriding the onCreateOptionsMenu method:
@Override
public boolean onCreateOptionsMenu(Menu menu) {
getMenuInflater().inflate(R.menu.menu_items, menu);
return true;
}
(Press ALT + ENTER for any red text. Or add import android.view.Menu;
to the top of your code.)
Your DisplayFavs code should look like this in earlier versions
of Android Studio:
And this in later versions:
This second Activity won’t have an up arrow, however. (The up arrow
is the left pointing one in the toolbar that takes you back to the main
screen.)
To get an up arrow, you need to make a call to the getSupportActionBar
method. This can return an ActionBar object. Add this to your onCreate
method, just below setSupportActionBar.
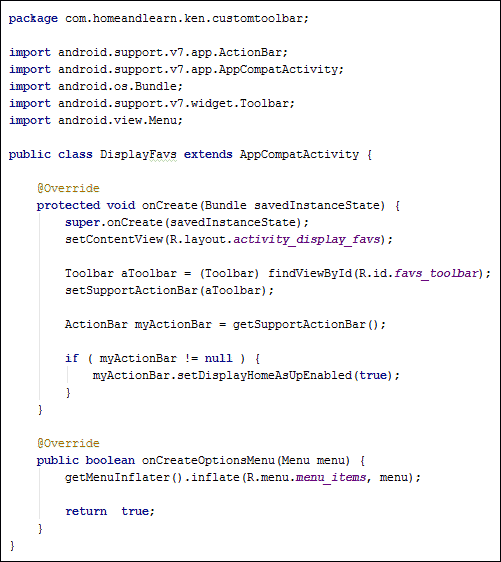
ActionBar myActionBar = getSupportActionBar();
You’ll need an import line at the top of your code. Add this in earlier
versions of Android Studio: import android.support.v7.app.ActionBar;
(Or press ALT + ENTER on any red text as a shortcut.) Add this import
in later versions: import androidx.appcompat.app.ActionBar;.
Once you’ve got an ActionBar object, you can set an up arrow with setDisplayHomeAsUpEnabled.
It’s a good idea to test if your ActionBar object isn’t null, though. Add these
lines then:
if ( myActionBar != null ) {
myActionBar.setDisplayHomeAsUpEnabled(true);
}
In between the round brackets of setDisplayHomeAsUpEnabled you only need a
true or false.
Your DisplayFavs code should look like this in earlier Android Studio
versions:
And this in later versions:
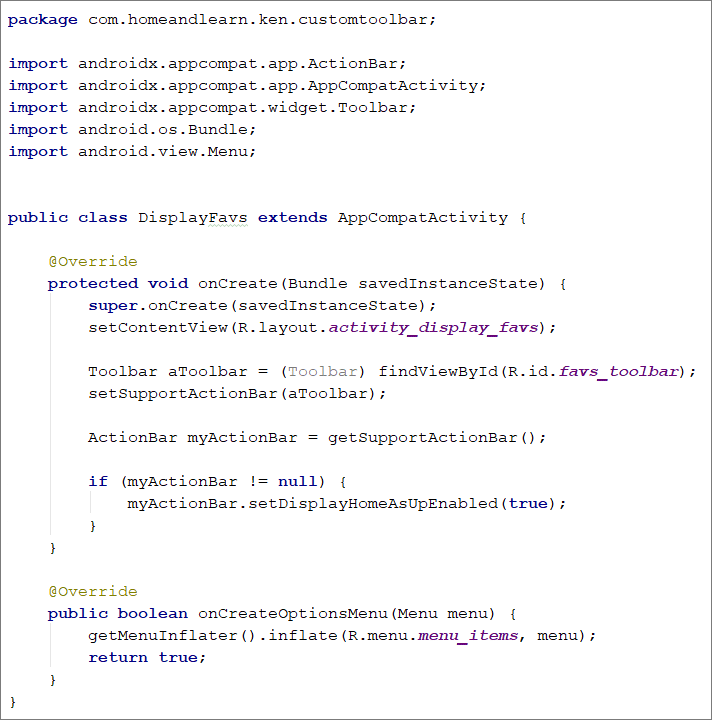
There’s one more thing to do for the up arrow, however. If you remember,
in a previous tutorial, we added a line to the Android Manifest file
when we set an up arrow. We’ll need to do the same again.
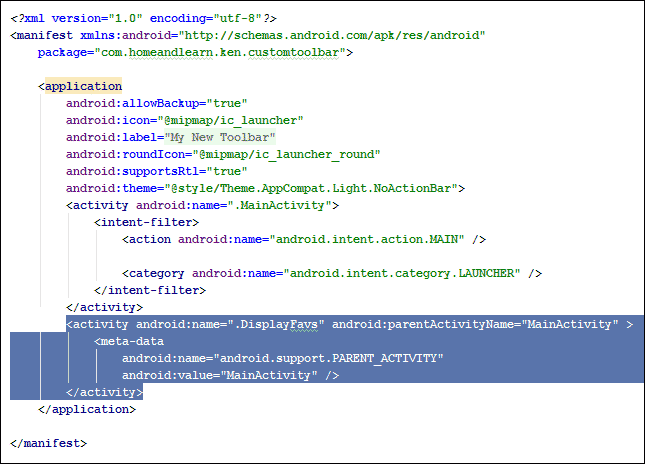
Open up your AndroidManifest.xml file, which is in the manifests folder in
the explorer area to the left of Android Studio. Locate this line:
<activity android:name=”.DisplayFavs”></activity>
Change it to this:
<activity android:name=”.DisplayFavs” android:parentActivityName=”MainActivity”
>
As before, we’ve added a parentActivityName attribute, setting it to
the MainActivity java file.
Because older devices might not recognise the parentActivityName attribute,
you can add a meta-data tag. Add this line just below the one you’ve
changed:
<meta-data
android:name=”android.support.PARENT_ACTIVITY”
android:value=”MainActivity” />
Your manifest file should look like this:
OK, we’re done with the AndroidManifest.xml file. You can close it down.
Go back to your MainActivity.java file. Your code for the menu item
selection looks like this:
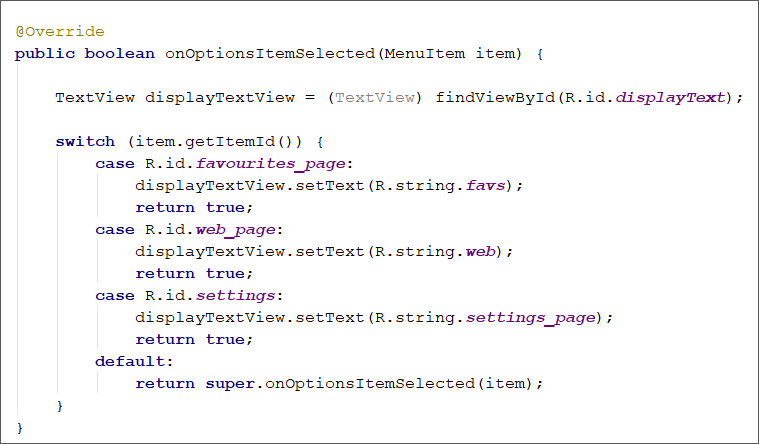
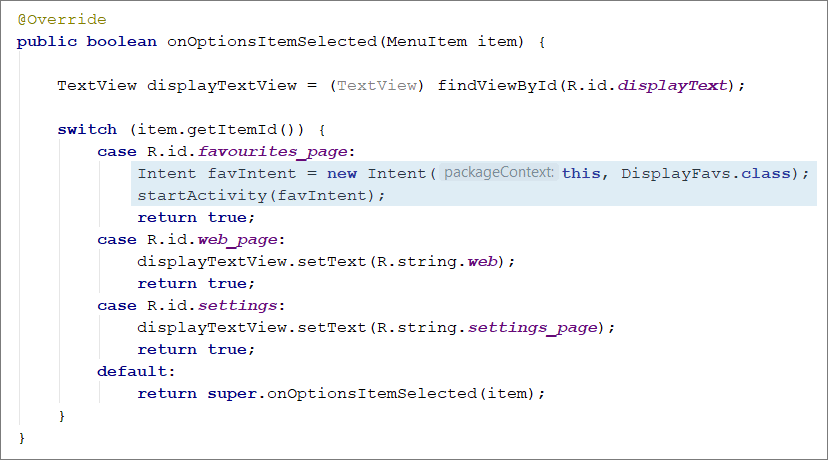
We can start our new Activity from the favourites_page case.
Comment out the line for displayTextView. Instead, we’re going
to create a new Intent. Add this code:
Intent favIntent = new Intent(this, DisplayFavs.class);
startActivity(favIntent);
(ALT + ENTER any red text, or add import android.content.Intent; to
the top of your code.)
You’ve met this code before, in a previous section. It just creates a new Intent
object and starts a new Activity. Your switch statement should look
like ours:
Try it out. Run your app. Click the Favourites icon in the toolbar.
You should see a new Activity start:
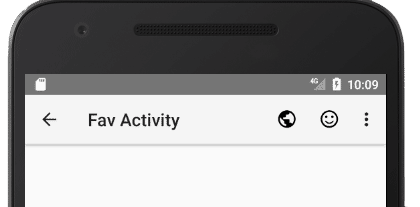
Notice the up arrow on the left. Click or press this to get back to the main
screen.
We’ll leave it there with Toolbars, and move on to a new section, which is a GridView and WebView project.
< Coding for Toolbar
icons | GridView and WebView Project Intro >
Back to the Android Contents Page
