You’ll need to do three things in your code: use onCreate to point to your
toolbar, use the onCreateOptionsMenu method to attach your menu items to the
toolbar, use onOptionsItemSelected to get which menu item was selected.
Open up your MainActivity.java file. Just after setContentView in the
onCreate method, add this line in earlier versions of Android Studio:
Toolbar myToolbar = (Toolbar) findViewById(R.id.myToolbar);
In later versions, you can remove the cast:
Toolbar myToolbar = findViewById(R.id.myToolbar);
This line gets a reference to your toolbar, the one on the activity_main.xml
file. Now add this line:
setSupportActionBar(myToolbar);
With the setSupportActionBar method, you’re setting up support for your toolbar
so that it can be used on a wide range of devices. In between the round brackets
of setSupportActionBar, you type the name of your toolbar.
Next, you need to override onCreateOptionsMenu. Add this just after the onCreate
method:
@Override
public boolean onCreateOptionsMenu(Menu menu) {
return true;
}
The only line you need to add (before return true) for the onCreateOptionsMenu
method is this one:
getMenuInflater().inflate(R.menu.menu_items, menu);
What you’re doing here is inflating the menu you created, the one called menu_items.
This will attach your menu to the toolbar. Your java code should look like this:

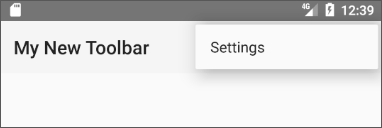
You can try it out, now. Run your app. It will look like this in the Emulator:

Click on the three dots, the Overflow Menu. You should see a sub menu appear:

We haven’t added any code for menu item selection, so nothing will
happen when you click on the items.
Stop your app from running and we’ll add code to detect if a menu item was
selected.
To check which menu item was selected, you can override the onOptionsItemSelected
method. Add the following method to your code, just after your onCreateOptionsMenu
method.
@Override
public boolean onOptionsItemSelected(MenuItem item) {
}
If you get any red text, press ALT + ENTER on your keyboard to add a reference
to the correct library. Or just type import android.view.MenuItem; at
the top of your code.
We haven’t added a return statement yet, so you’ll probably get errors in your
code.
First, we can get a reference to the TextView on the layout:
TextView displayTextView = (TextView) findViewById(R.id.displayText);
Next, we can set up an switch statement. This will examine the item
variable that is between the round brackets of onOptionsItemSelected.
The item variable is a MenuItem type. You can use getItemId on it to
see which menu item was selected:
switch ( item.getItemId( ) ) {
}
You can then check if the item id matches one of your menu item IDs.
switch (item.getItemId()) {
case R.id.favourites_page:
displayTextView.setText(R.string.favs);
return true;
}
Inside of the switch statement, we have this:
case R.id.favourites_page:
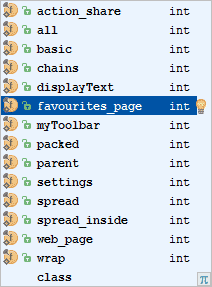
As soon as you type a dot after R.id you’ll see a menu appear. This
one:

On the list are the IDs you set up for your menu items. Select the favourites_page
ID.
The only thing we want to happen when this menu item is selected is to display
some text in our TextView. We do it like this:
displayTextView.setText(R.string.favs);
In between the round brackets of setText, you can grab one of those strings
you set up in your strings.xml file:
R.string.favs
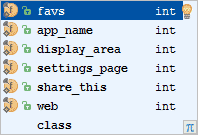
In fact, you should a list of them appear, when you type the dot after string:

Select favs from the list.
The only other thing in the case part of the switch statement is return
true.
Now add three more case parts, just under the first one:
case R.id.web_page:
displayTextView.setText(R.string.web);
return true;
case R.id.settings:
displayTextView.setText(R.string.settings_page);
return true;
There is one case for every item we added to our menu. The only thing we need
is a default case for our switch statement. Add this, just under the final case:
default:
return super.onOptionsItemSelected(item);
This returns a call to the super class for onOptionsItemSelected.
The whole of your onOptionsItemSelected method should look like this:

And the whole of your code should look like this in earlier versions
of Android Studio:

And this in later versions:

Try it out. Run your app and click on your toolbar menu items. You
should see some text appear in your display TextView area. In the next
lesson, we’ll add an new Activity to the project. You’ll learn how to
launch this new Activity when an icon is clicked or tapped.
< Android Vector
Assets | Menu Item – New Activity >
Kaynak : https://www.homeandlearn.co.uk/android/java_code_for_toolbar.html ‘sitesinden alıntı
