You can syle the rows that make up your list of items. You’ll see how to do
that now. We’ll add a background colour, first.
There is already an XML file set to hold your colour values. To find it, expand
the res > values folder in the Explorer area on the left. Locate a
file called colors.xml:
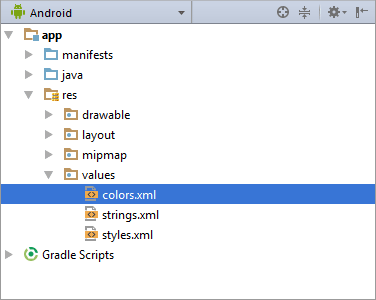
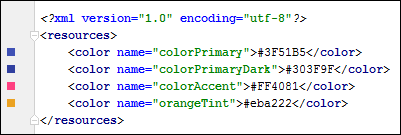
Double click this file to see the following:

There are three colours already set up. These are used for the inbuilt styles.
You can see these, if you open up the styles XML file in the values
folder:

Notice how the colour names are used:
@color/colorPrimary
You do a similar thing when setting up and using your own colours.
Switch back to the colors.xml file. Enter a new color:
<color name=”orangeTint”>#eba222</color>
We’ve called this colour orangeTint, but you can type anything you like
for a name. In between the angle brackets, you need a hexadecimal colour value.
We’ve gone for eba222 (hex values are not case sensitive).
If you’re not up to speed on hexadecimal colour values, here’s a short primer.
Hexadecimal values have six position, two for red, two for green, and two for
blue:
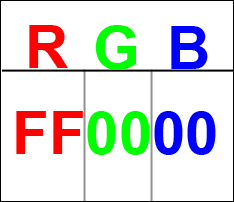
You can use the digits 0 to 9, and the letters A to F. In the image above,
FF means switch the red full on. The two green positions are 00, meaning switch
the green off. Likewise, the blue positions are 00, switching the blue off.
The results of #FF0000 is red. (You need the hash/pound sign before your hex
values.) If instead we type #00FF00, we’d get green. Blue would be #0000FF.
If, however, we typed #EF1EE3 we’d get a nice pink colour. The hexadecimal value
we have chosen for our orangeTint name is #EBA222. But you change this to anything
you like.
Quite helpfully in Android Studio, you get a colour square of your hex value
in the margins:
You can change a colour by clicking on a square:
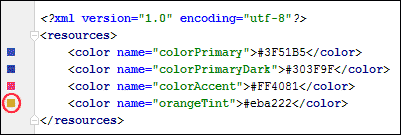
This will bring up a colour picker dialogue box:
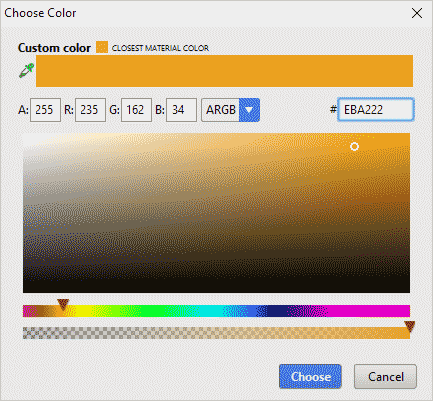
Or this one, in later versions of Android Studio:
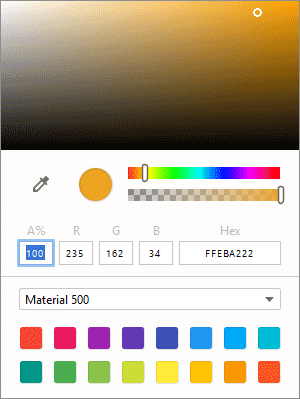
Now that we have a colour set up, we can use it elsewhere.
Right-click your res > drawable folder. From the menu that appears,
select New, then Drawable resource file:
Type name for your XML file in the File Name box at the top. We’ve called ours
list_colours, but you can call it something else, if you prefer:
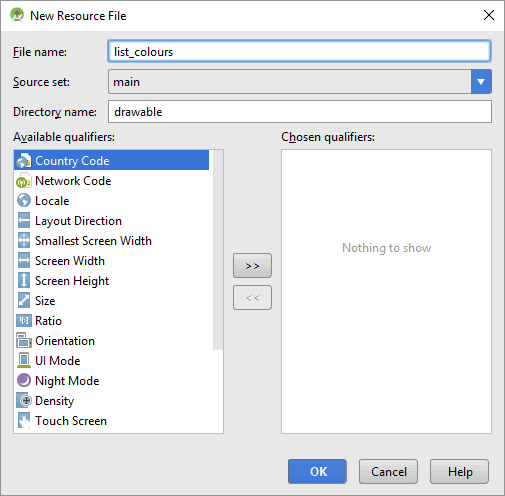
Click OK to create your new XML file. It should look like this:
<?xml version=”1.0″ encoding=”utf-8″?>
<selector xmlns:android=”https://schemas.android.com/apk/res/android”>
</selector>
We’re going to create a state_pressed item, here. So type the following
before </selector>:
<item android:state_pressed=”false” android:state_selected=”false”
When you hit the space bar after the “false”, you’ll see this menu
appear:
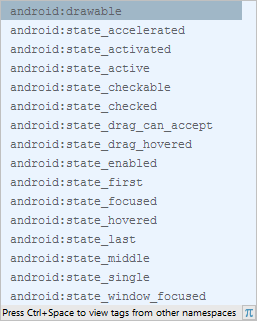
Select android:drawable from the list. When you do, you’ll see another
list appear. This one:
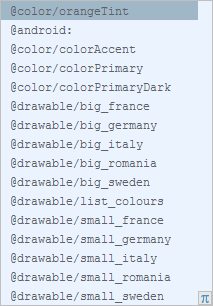
The list is all your files from the drawable folder. But notice that Android
Studio has also pulled colours from the colors.xml file, including the
one we’ve just set up – orangeTint. Select this one and your XML file. Type
an angle bracket to finish the ITEM tag. (Instead of the two ITEMS tags, you
can get rid of the end one and just type />.
Your list_colours.xml file should look like this:

Now to put this drawable.xml file to use.
Click back on your activity_main.xml file. In the Component
Tree, click on your flagListView item to select it. In the properties
area on the right, scroll down and click on View all properties
right at the bottom. Locate the listSelector property. In later
versions of Android Studio, it’s under the All Attributes item.
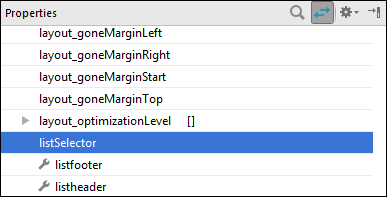
Click the button to the right of the text area:

This will bring up the Resources dialogue box again. In the Drawable section
on the left, scroll down to see your list_colours item:
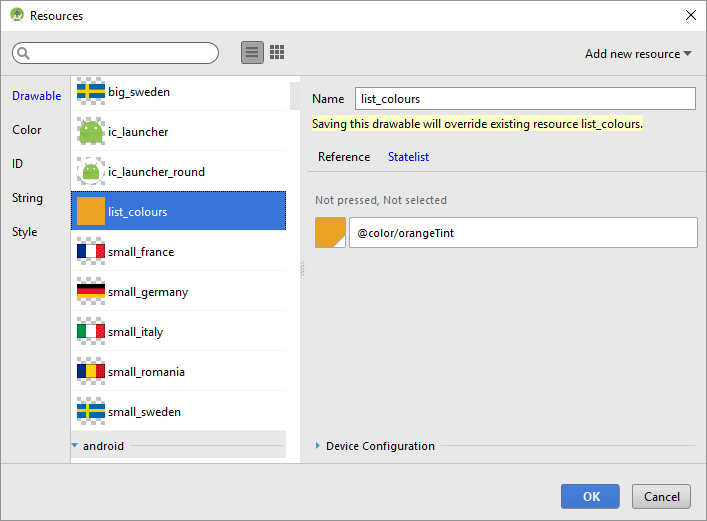
As you can see, it has picked up our orangeTint colour. This is coming directly
from the list_colours XML file we set up in the Drawable folder.
Click OK to set the colour for a row item.
Now try it out. Run your app and select a row item. You should see this, instead
of the default colour for row selection:
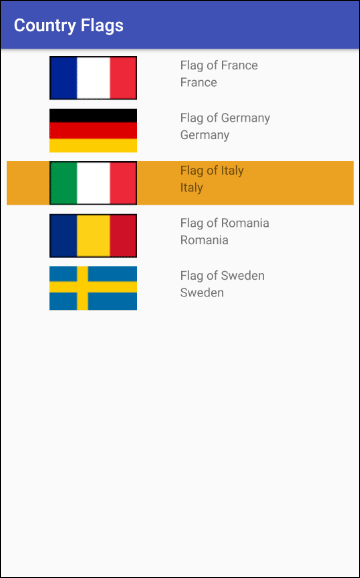
You’ll now learn how to replace that solid colour above with a gradient as
the background for the row selection. We’ll do that in the next lesson below.
< Custom List
New Activity| Gradient Backgrounds >
Back to the Android Contents Page
