Open up Android Studio. When you open the software for the first time, you
should see a screen like this one:

When you create projects, they will appear in the white area on the left, ready
to be quickly reopened. Since you haven’t created a project yet, click the link
that says Start a new Android Studio project. When you click this link,
you’ll get the following dialogue box:
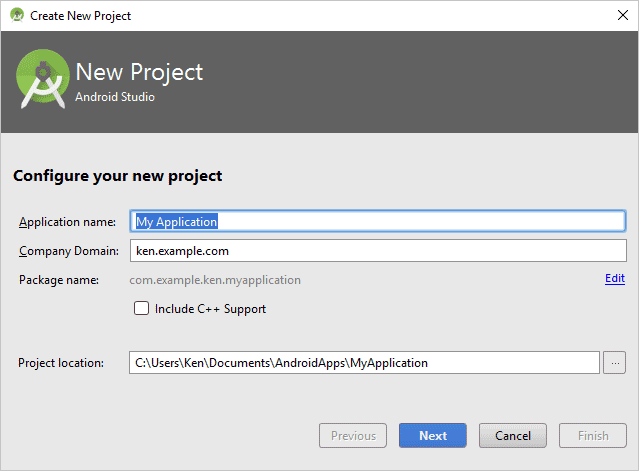
In the Application name area at the top, enter Hello Android World. (Some people
have reported problems with white spaces in application names when running on
an Android Virtual Device. It’s been OK for us, though.)
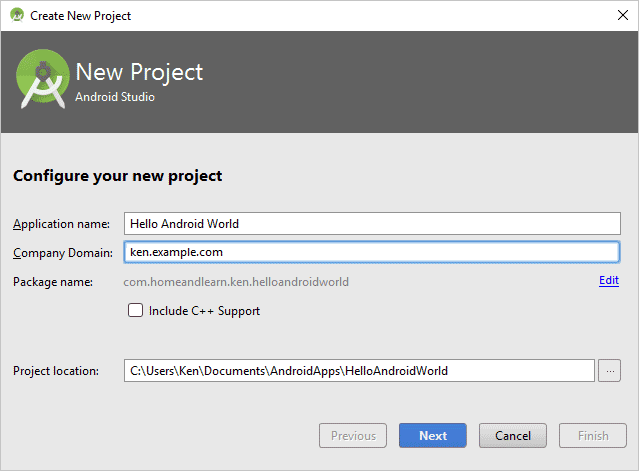
The Company Domain name can be changed to something a little more useful to
you. The one in the image above says ken.example.com. This will used
as a package name (where all your files live). But note that the package name
is reversed: com.example.ken. This is somewhat confusing, as it’s not
a domain name for the internet. So it’s not a real web address. All you’re doing
here is settings up a unique namespace that points to where all your applications
files live. In the image below, we’ve changed our Company Domain name:
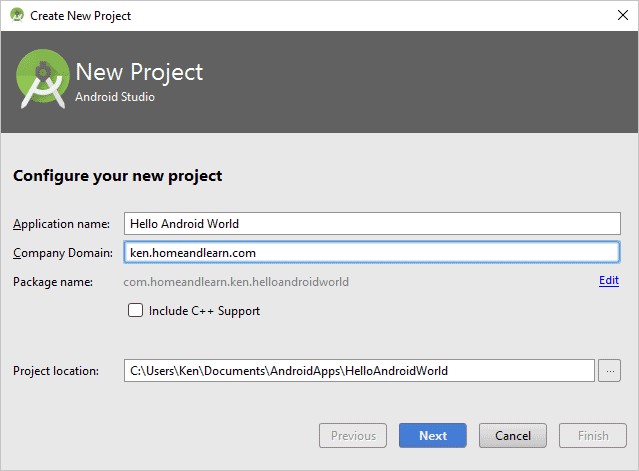
You can type almost anything you like as the Company Domain, as long as your
names are separated by dots.
The Project Location at the bottom is where you’re saving your project
to. We’re saving this to the Documents folder, inside another folder
called AndroidApps. Click the button on the right of the textbox, if
you want to save your project elsewhere.
Click the Next button when you’ve filled in all the boxes above. The
screen will then look like this:
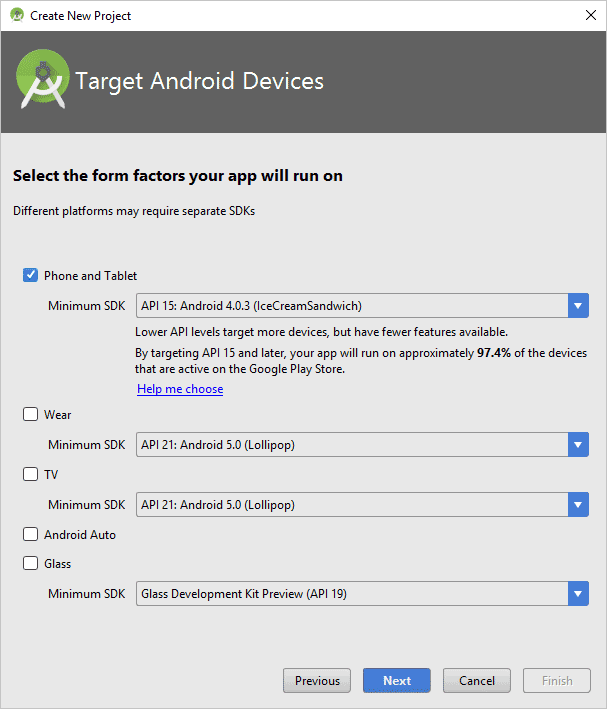
This screen is asking you to select where your app will be running: on a phone
or tablet, on a wearable device, on a TV, on Android Auto, or Android Glass.
We’ll only be creating projects for phones or tables, so make sure that option
is selected.
Have a look at the dropdown box for Minimum SDK. (SDK is short for Software
Development Kit.)
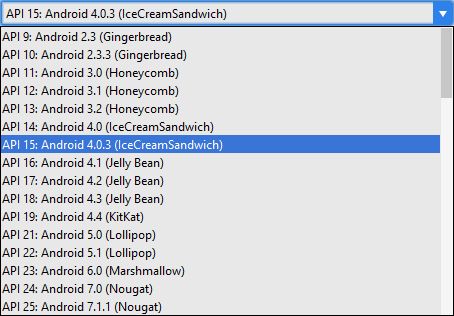
The list shows you all the various flavours of the Android operating system.
What you’re doing here is selecting the minimum version that you’d like to support.
When you select a flavour, it will display what percentage of all Android users
that you will be reaching. By selecting Ice Cream Sandwich, we’ll be reaching
97.4 percent of all Android users.
Click the Help me choose link to see a breakdown of all the different
Android flavours:
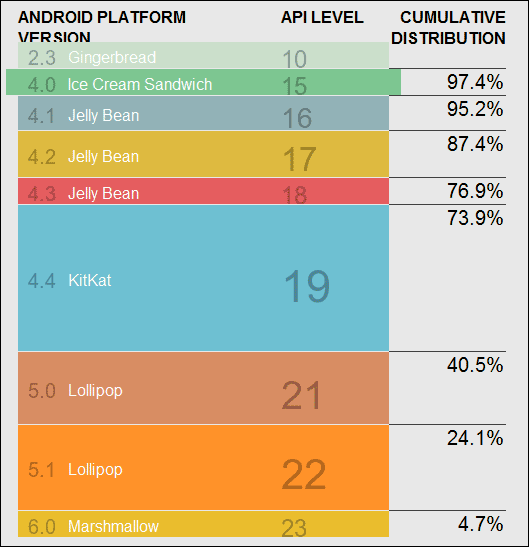
Take note of the API levels for each Android version. Ice Cream Sandwich is
API level 15. The higher the API level the more features are added. So if you
decide to develop for KitKat and later, API level 19 or greater, then testing
on a phone that has an API level of 15 will cause you problems. Simple because
Ice Cream Sandwich won’t have those new features of API level 19. You’ll see
how to change API levels in your code. It’s quite easy!
Click Next on your New Project dialogue box, though. The next screen
is a list of the available projects templates:

We want Empty Activity. Select that one and click Next. You’ll
see this screen:

Just leave the Activity Name and Layout Name on the defaults. But the Activity
is the name of a Java file, and Layout is the name of an XML file. The XML file
takes a reverse, lowercase version of the Activity Name.
Click Finish to create your first project. (It’s a bit slow to load,
though. Best to wait for any red lines to disappear before doing anything.)
In the next lesson, we’ll take a look at the Android Studio IDE.
< What you need |
A First Project >
Back to the Android Contents Page
